If you’ve ever pulled into Checkers or Rally’s, there’s a good chance the fries were the first thing you noticed. They aren’t just another side on the menu. That crispy, seasoned coating and fluffy potato center have made them one of the restaurant’s most talked-about menu items, and plenty of people would happily order them all by themselves.
That’s exactly why this Checkers Seasoned Fries Recipe has become a favorite for making at home.
Unlike regular French fries, these are lightly battered before the final fry, which creates the signature crunchy crust that holds onto every bit of the savory seasoning blend.
After testing different methods, I found that a cold sugar-water soak, a double-fry, and a simple seasoned batter come surprisingly close to the texture and flavor people remember from the restaurant.
This homemade Checkers fries version recreates the same crispy coating, soft interior, and bold seasoned flavor using everyday ingredients you can easily find.
Serve them with burgers, crispy chicken sandwiches, or your favorite dipping sauce, and you’ll have a homemade fast-food meal that tastes familiar from the very first bite.

What Potatoes Should You Choose To Make Fries like Checkers
Large russet potatoes are easily the best choice for this recipe. Their high starch and low moisture content create the fluffy interior that makes Checkers fries so satisfying.
I avoid waxy potatoes like red or Yukon Gold because they stay firmer and never develop that soft, almost mashed-potato center after frying.
Try to buy potatoes that are similar in size so every fry cooks at about the same rate. Fresh potatoes without green spots or sprouts also produce better flavor and color.
Even though peeling is optional for many homemade fries, I recommend peeling them here because that’s much closer to the classic Checkers look and helps the seasoned batter stick more evenly.
Perfect For
Backyard Burger Nights – Stack these crispy Checkers seasoned fries beside juicy cheeseburgers, grilled hot dogs, or bacon burgers for a homemade fast-food dinner everyone will recognize.
Game Day Snack Boards – Serve a basket of hot fries with ranch, cheese sauce, barbecue sauce, and spicy mayo so everyone can grab their favorite dip during the game.
Family Friday Takeout Nights – Skip the drive-thru and recreate the classic Checkers meal at home with crispy chicken sandwiches, burgers, and these famous seasoned fries.
Cookouts & Summer Gatherings – A great alternative to plain French fries when you’re grilling burgers, barbecue chicken, smoked sausages, or pulled pork.
Movie Night Favorites – Fill a large basket with fresh fries while they’re still hot and crispy. They’re easy to share and disappear long before the movie is over.
Casual Party Food – Perfect for birthdays, football parties, or weekend get-togethers because you can fry multiple batches and keep everyone coming back for more.
Restaurant Copycat Cravings – Ideal for anyone who misses the bold flavor of Checkers fries and wants a homemade version that’s crispy, well-seasoned, and made with everyday ingredients.
Checkers Seasoned Fries Ingredients
For the Potatoes
2 large russet potatoes, peeled – Russet potatoes are my first choice because they’re high in starch and turn fluffy inside while staying crispy outside. Try to pick two potatoes that are close in size so every fry cooks evenly from batch to batch.
2 cups cold water – Cold water rinses away extra surface starch and helps the potatoes soak without softening too quickly. I like using very cold tap water, and if my kitchen is warm, I’ll even toss in a couple of ice cubes.
1 tablespoon granulated sugar – Don’t worry, the fries won’t taste sweet. The sugar simply helps the potatoes brown more evenly and gives them that rich golden color that’s so close to the restaurant version.
Vegetable oil, for frying – A neutral oil works best because it lets the seasoning shine. I usually use vegetable oil, but canola or peanut oil are both great choices since they handle high frying temperatures really well.
For the Seasoned Batter
1 cup all-purpose flour – Regular all-purpose flour creates the base of the crispy coating. There’s nothing fancy needed here, and any standard brand from your grocery store will work perfectly for this recipe.
¼ cup cornstarch – Cornstarch is what helps make the coating lighter and crispier instead of thick and heavy. It’s a small ingredient, but it makes a big difference in getting that classic Checkers-style crunch.
1 tablespoon seasoned salt – This is where most of the signature flavor comes from. I usually reach for Lawry’s Seasoned Salt because it has the savory blend that reminds me most of the fries served at Checkers.
1 teaspoon garlic powder – Garlic powder adds a smooth savory flavor without being overpowering. It blends evenly into the batter and gives every bite a little extra depth that fresh garlic just can’t provide here.
1 teaspoon paprika – Paprika brings a mild pepper flavor and helps give the fries their deep golden color. I use regular paprika, but smoked paprika can be used if you want a slightly different flavor.
½ teaspoon chili powder – Just a little chili powder gives the seasoning blend extra warmth without making the fries spicy. It works with the paprika and garlic to build that familiar restaurant-style flavor.
½ teaspoon ground black pepper – Black pepper adds a little bite and balances the other seasonings. Freshly ground pepper has the strongest flavor, but regular pre-ground pepper from your spice cabinet works just as well.
¼ teaspoon Accent seasoning (MSG) – Accent seasoning gives these fries that savory restaurant flavor many people recognize. It’s completely optional, but I like using a small amount because it brings the homemade version even closer to the original.
6 to 12 tablespoons ice-cold water – Ice-cold water helps create a lighter batter that fries up crisp instead of dense. I always add it a little at a time until the batter lightly coats each fry without becoming too thick.
How To Make Checkers Seasoned Fries at Home
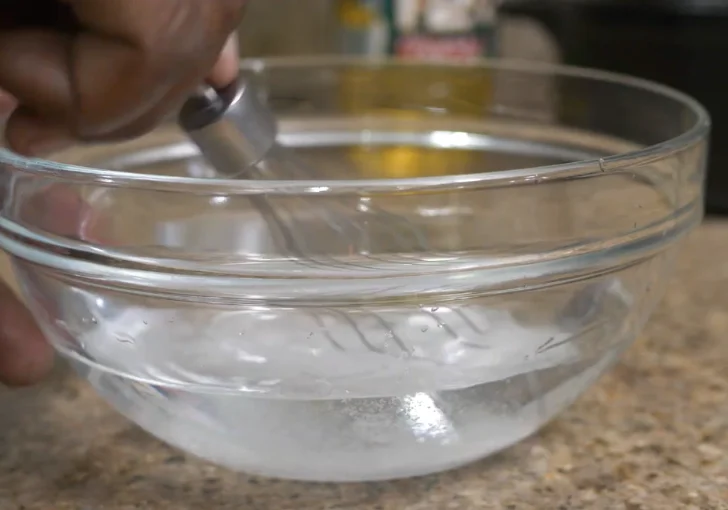
Step 1 | Prepare the Sugar Water
In a medium bowl, combine the cold water and granulated sugar. Stir until the sugar completely dissolves. The water should be very cold, as this helps prepare the potatoes for the best texture and browning during frying.
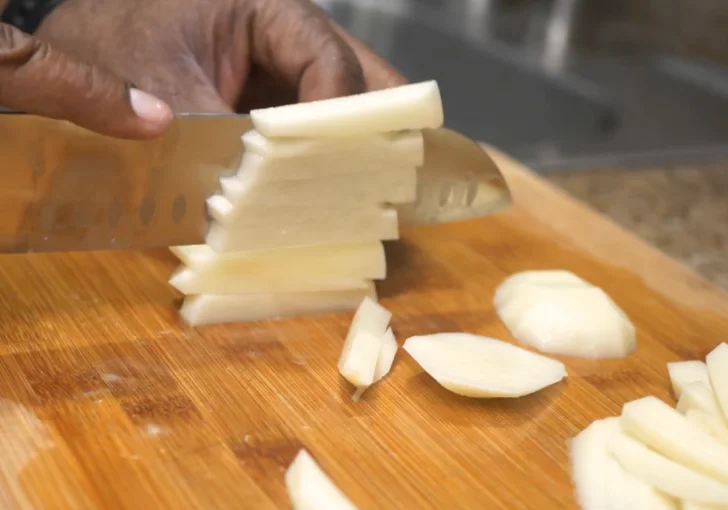
Step 2 | Cut the Potatoes
Peel the russet potatoes and slice them into medium-sized fry strips. Avoid cutting them too thin since medium-cut fries develop a fluffy center while holding the crispy coating much better.
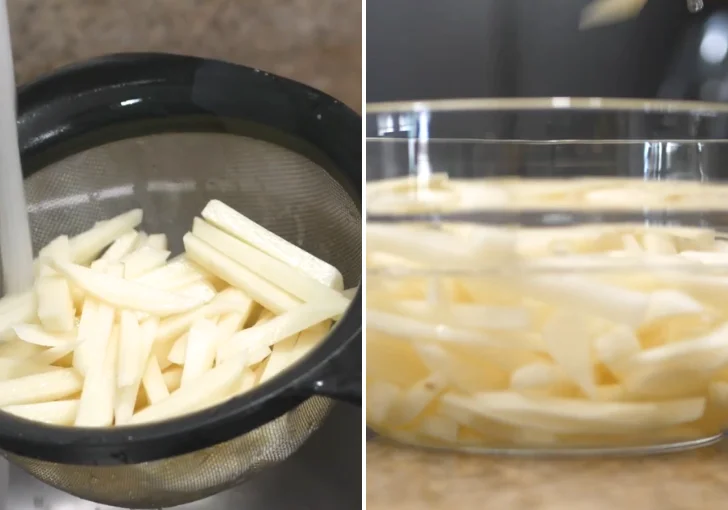
Step 3 | Rinse and Soak
Rinse the cut potatoes under cold running water to wash away some of the surface starch. Transfer the fries to the cold sugar water and soak for at least 15 minutes. The sugar encourages even caramelization, giving the fries their signature golden color.
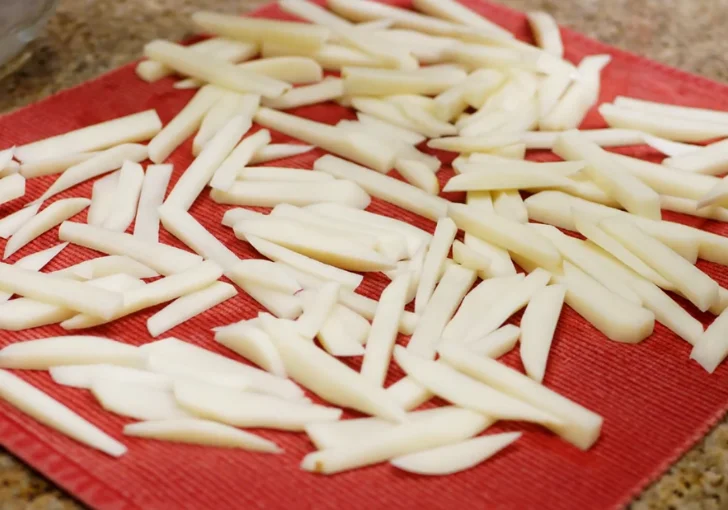
Step 4 | Dry the Potatoes
Remove the fries from the sugar water and pat them completely dry with paper towels. Excess moisture can cause the oil to splatter and prevent the coating from sticking properly later.
Step 5 | First Fry
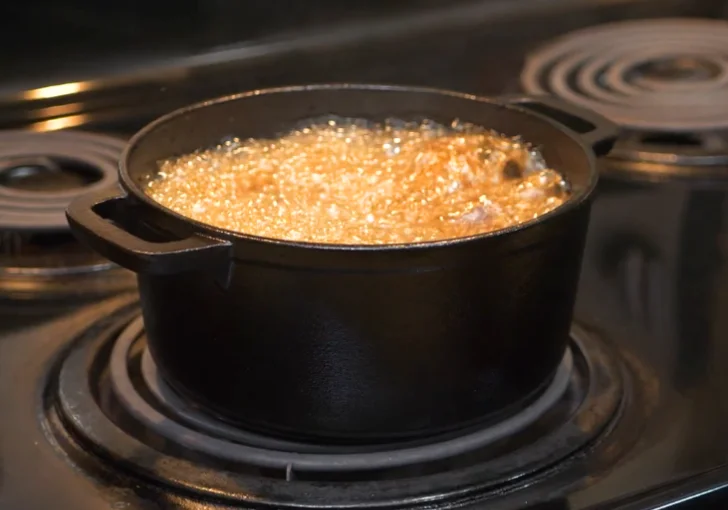
Heat vegetable oil to 375°F (190°C) in a Dutch oven or heavy pot. Fry the potatoes in small batches for about 3 minutes, just until they begin to develop a slight color. At this stage, the fries will still be soft and undercooked, which is exactly what you want.
Step 6 | Freeze the Fries
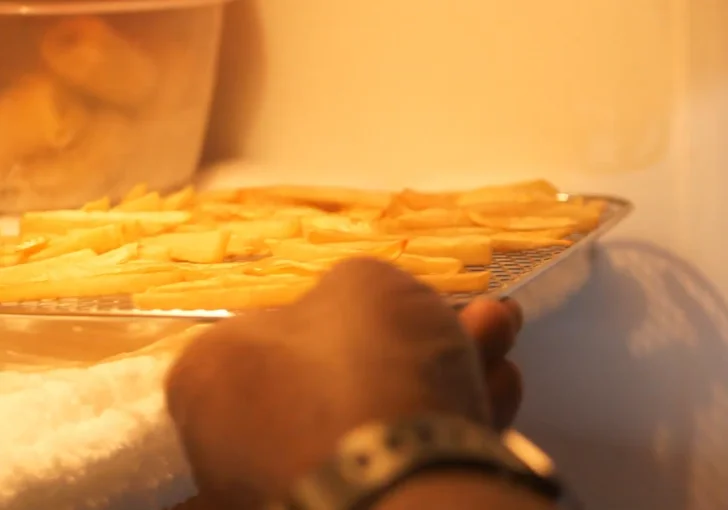
Transfer the blanched fries to a tray in a single layer and place them in the freezer for 30 minutes to 1 hour. Chilling firms the potatoes and helps the batter cling evenly during the second fry.
Step 7 | Make the Seasoned Batter
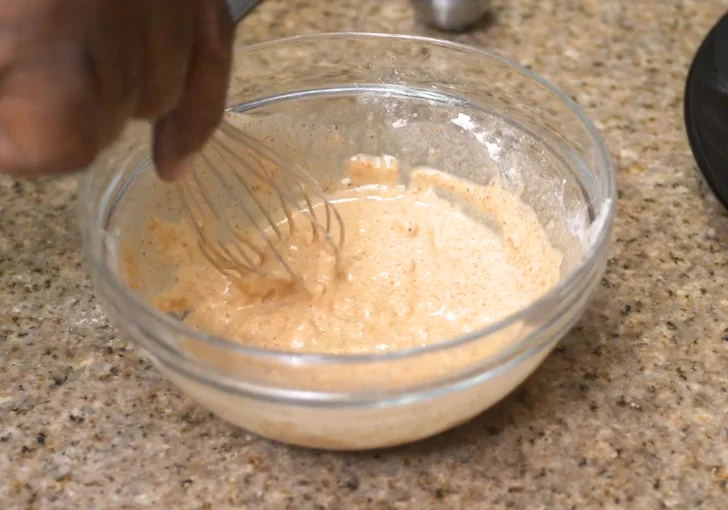
In a mixing bowl, whisk together the flour, cornstarch, seasoned salt, garlic powder, paprika, chili powder, black pepper, and Accent seasoning. Gradually add 6 to 12 tablespoons of ice-cold water, stirring after each addition until a medium-thick batter forms. The batter should coat a fry without running off but should not be so thick that it becomes difficult to spread. Let the batter rest for several minutes to naturally thicken.
Step 8 | Coat the Fries
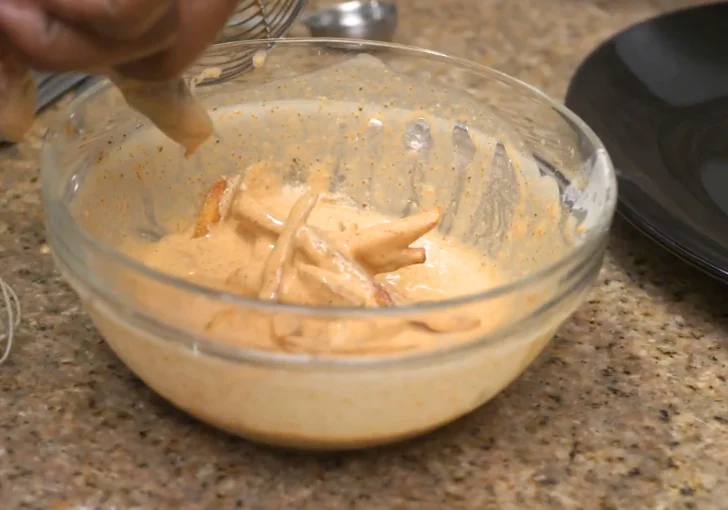
Remove the chilled fries from the freezer while they are still cold. Dip each fry into the seasoned batter, coating it lightly and evenly. Shake off any excess batter before frying.
Step 9 | Final Fry
Increase the oil temperature to 400°F (205°C). Fry the battered potatoes in small batches for 2 to 3 minutes, or until the coating is deep golden brown and crispy. The hotter oil quickly crisps the outside while finishing the inside, creating a creamy mashed potato-like texture.
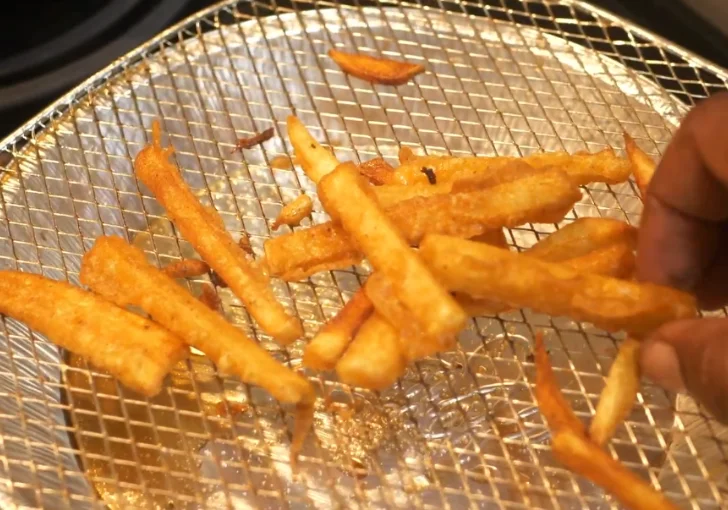
Step 10 | Drain and Serve
Transfer the fries to a wire rack or paper towel-lined plate to drain briefly. Serve immediately while hot for the best crispy texture and full seasoned flavor.
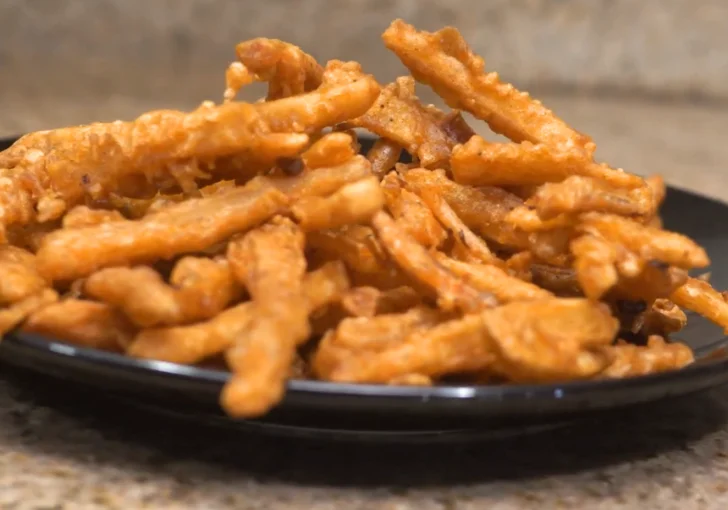
Checkers Seasoned Fries Perfection Tips & Notes
- Use russet potatoes for the best texture. They give you that soft, fluffy center while the outside gets crispy after frying.
- Keep the sugar water cold while the potatoes soak. Warm water can change the texture and won’t help the fries brown the same way.
- Cut the fries into similar sizes. Thin pieces will cook too fast, while thick pieces may not get the same crispy coating.
- Dry the potatoes completely before the first fry. Extra moisture can make the oil splatter and keeps the seasoned batter from sticking well.
- Freeze the fries after the first fry. This step helps the coating grab onto the potatoes instead of sliding off during frying.
- Add the ice-cold water slowly to the batter. You want a coating that sticks to the fries but still fries up light and crispy.
- Do not skip the double fry. The first fry cooks the potato inside, while the second fry creates the crunchy outside that makes these fries special.
- Fry in small batches. Adding too many fries at once drops the oil temperature and can leave them greasy instead of crisp.
- Drain the finished fries on a wire rack if possible. Keeping them raised allows air to move around them so the coating stays crunchy.
Air Fryer Cooking Method
Prepare the Fries – Complete every step through coating the fries with batter. Instead of dropping them into oil, lightly spray both sides with cooking oil.
Preheat the Air Fryer – Heat the air fryer to 400°F for about 5 minutes. Starting with a fully heated basket helps the coating crisp faster.
Arrange in a Single Layer – Place the fries in one layer with small spaces between them. I avoid overcrowding because the hot air needs room to circulate.
Cook Until Crispy – Air fry for 12 to 15 minutes, flipping halfway through and lightly spraying again if needed. Depending on your air fryer model, they may need another 2 or 3 minutes for extra crispness.
Serve Immediately – Let the fries rest for one minute before serving so the coating stays crisp instead of steaming.
What to Serve with This Checkers Seasoned Fries
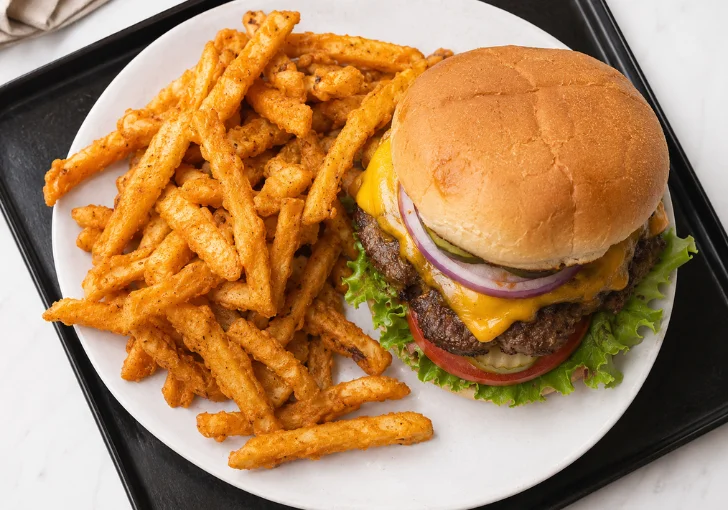
A juicy cheeseburger is probably the most natural partner for these fries. The crispy seasoned coating balances perfectly with a rich burger, while ketchup, ranch, or spicy fry sauce gives everyone a different way to enjoy them.
Fried chicken sandwiches also make an excellent pairing. The crunchy chicken and seasoned fries create the kind of fast-food meal that feels familiar but tastes even better because everything is freshly made at home.
These fries are also wonderful beside barbecue pulled pork, grilled hot dogs, crispy chicken tenders, or even a simple club sandwich.
If you’re serving them for a party, set out small bowls of cheese sauce, honey mustard, barbecue sauce, garlic aioli, and buffalo ranch so everyone can mix and match their favorite flavors.
Store Leftovers & Reheat
Leftovers
Allow the fries to cool completely before storing them in an airtight container. Refrigerate for up to 3 days. For longer storage, freeze them in a freezer-safe bag for up to 2 months. Try not to seal them while they’re still warm because trapped steam softens the crispy coating.
Reheat
For the crispiest results, reheat refrigerated fries in a 400°F oven or air fryer for 4 to 6 minutes. Avoid the microwave whenever possible since it softens the coating. Frozen fries can go straight into the oven or air fryer with just a couple of extra minutes added to the cooking time.
FAQs
Can I make these Checkers seasoned fries without MSG?
Yes, you can leave out the Accent seasoning if you don’t use MSG. The fries will still have plenty of flavor from the seasoned salt, garlic powder, paprika, and other spices in the batter.
Why do these fries need to be fried twice?
The first fry gently cooks the potato and builds the soft inside texture. The second fry at a higher temperature crisps the coating and gives the fries that crunchy restaurant-style finish.
Can I leave the potato skins on for this recipe?
You can, but peeling the potatoes gives a closer match to Checkers seasoned fries. The smooth surface also helps the seasoned batter stick better and creates a more even crispy coating.
How thick should the seasoned batter be?
The batter should be thick enough to lightly cover each fry but still fall easily from a spoon. If it looks heavy or clumpy, add cold water one tablespoon at a time.
Can I make these fries ahead of time?
Yes. You can complete the first fry and freeze the potatoes for several hours or overnight. When ready to serve, coat the cold fries with batter and finish frying until crispy.
Why is my batter not sticking to the fries?
The potatoes may still have too much moisture, or they may not be cold enough after freezing. Make sure the fries are dry before the first fry and chilled before adding the batter.
Checkers Seasoned Fries Recipe
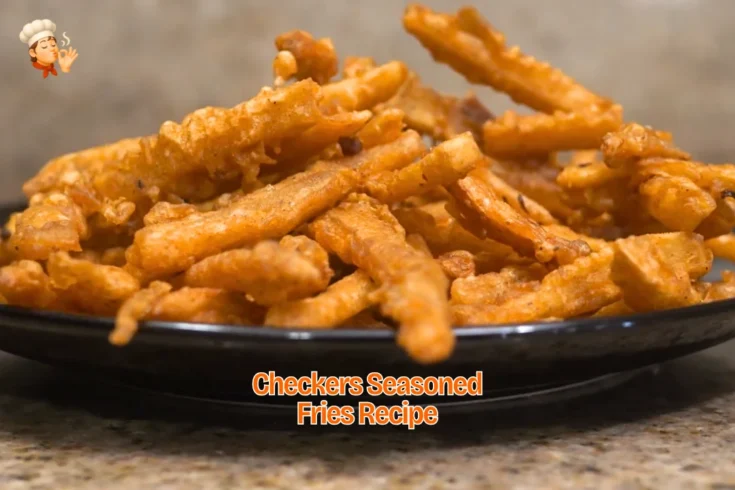
Make this Checkers Seasoned Fries Recipe at home with crispy battered potatoes, bold spices, and the same crave-worthy flavor fans love from Checkers and Rally’s. This copycat seasoned fries recipe uses a simple double-fry method, cold sugar water soak, and savory coating to create golden fries with a fluffy center. Ready in about 1 hour, these homemade Checkers fries are easier than you think and perfect for weekend meals. Serve them with burgers, chicken sandwiches, or your favorite dipping sauces for a restaurant-style meal you can enjoy at home.
Ingredients
- 2 large russet potatoes, peeled
- 2 cups cold water
- 1 tablespoon granulated sugar
- Vegetable oil, for frying
For the Seasoned Batter
- 1 cup all-purpose flour
- ¼ cup cornstarch
- 1 tablespoon seasoned salt
- 1 teaspoon garlic powder
- 1 teaspoon paprika
- ½ teaspoon chili powder
- ½ teaspoon ground black pepper
- ¼ teaspoon Accent seasoning (MSG)
- 6 to 12 tablespoons ice-cold water
Instructions
- In a medium bowl, combine the cold water and granulated sugar. Stir until the sugar completely dissolves.
- Peel the russet potatoes and slice them into medium-sized fry strips. Avoid cutting them too thin since medium-cut fries develop a fluffy center while holding the crispy coating much better.
- Rinse the cut potatoes under cold running water to wash away some of the surface starch. Transfer the fries to the cold sugar water and soak for at least 15 minutes.
- Remove the fries from the sugar water and pat them completely dry with paper towels. Excess moisture can cause the oil to splatter and prevent the coating from sticking properly later.
- Heat vegetable oil to 375°F (190°C) in a Dutch oven or heavy pot. Fry the potatoes in small batches for about 3 minutes, just until they begin to develop a slight color. At this stage, the fries will still be soft and undercooked, which is exactly what you want.
- Transfer the blanched fries to a tray in a single layer and place them in the freezer for 30 minutes to 1 hour. Chilling firms the potatoes and helps the batter cling evenly during the second fry.
- In a mixing bowl, whisk together the flour, cornstarch, seasoned salt, garlic powder, paprika, chili powder, black pepper, and Accent seasoning. Gradually add 6 to 12 tablespoons of ice-cold water, stirring after each addition until a medium-thick batter forms. The batter should coat a fry without running off but should not be so thick that it becomes difficult to spread. Let the batter rest for several minutes to naturally thicken.
- Remove the chilled fries from the freezer while they are still cold. Dip each fry into the seasoned batter, coating it lightly and evenly. Shake off any excess batter before frying.
- Increase the oil temperature to 400°F (205°C). Fry the battered potatoes in small batches for 2 to 3 minutes, or until the coating is deep golden brown and crispy.
- Transfer the fries to a wire rack or paper towel-lined plate to drain briefly. Serve immediately while hot for the best crispy texture and full seasoned flavor.
Nutrition Information:
Serving Size:
About 1 cup of seasoned fries per personAmount Per Serving: Calories: 380Total Fat: 18gCarbohydrates: 52g
Making this Checkers Seasoned Fries Recipe at home is a fun way to enjoy the crispy, seasoned fries you remember from the restaurant without the drive-thru.
After testing this copycat Checkers fries recipe, I love how the double-fry method creates the perfect crunch and fluffy potato center.
Serve them fresh with your favorite meals, and you’ll have a homemade side that everyone reaches for first.