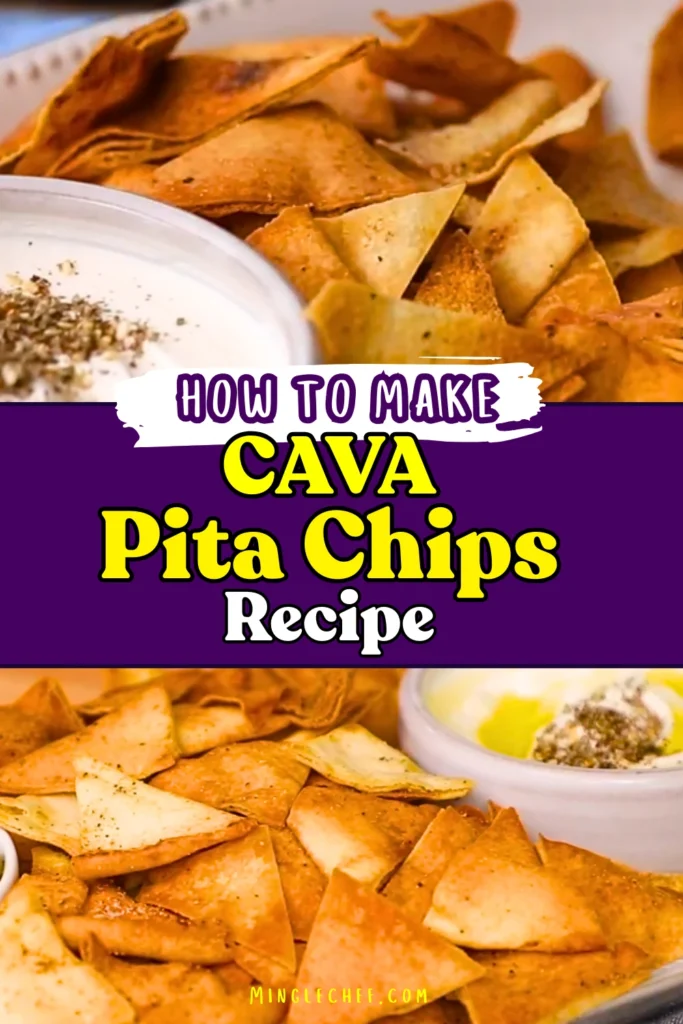
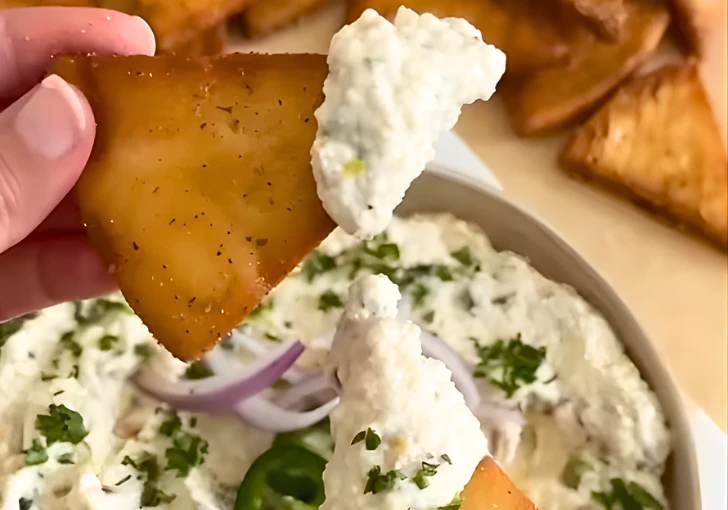
CAVA Pita Chips Recipe is one of those snacks I didn’t expect to love—but now its my favourite to snack to enjoy with my favourite dip. It’s not just a chip—it’s the bite that completes the dip.
The first time I had them at CAVA, it was just a side with my bowl served with hummus dip. Before my first bite, I though it’s not that good but after that bite everything changed. That’s when I get that why everyone was recommending this to try.
I tried store-bought pita chips many times, but none of them felt right. But nothing match the taste of the original, I always make those pita chips at home.
Today, I’m making CAVA pita chips copycat recipe again to gift someone. I use basic pantry items. The taste stays close to what you get at CAVA. You should try it too if you love hummus, labneh, or simple snacks that don’t feel fake.
What Pita Bread Should I Use To Make CAVA Pita Chips?
To make perfect like CAVA pita chips, I always use traditional Lebanese pita, the really thin kind. It’s not the thick grocery-store pocket pita. This one is softer, flatter, and much lighter. If you’ve seen brands like Damascus Bakeries, or any bakery-style Lebanese pita, that’s exactly what I mean.
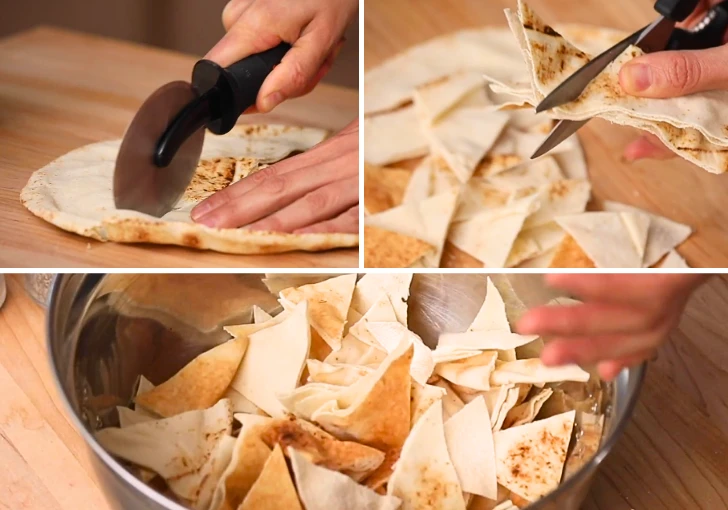
I keep both layers together when I cut it. Since it’s already thin, leaving it whole makes the chip sturdier after baking. I grab a pizza cutter and slice it into small triangles. It’s quick and clean.
If you’re using thicker pita, go ahead and peel the layers apart first. That helps it bake evenly and keeps it from getting tough instead of crisp.
Perfect For
- Quick snack when you want crunch without junk
- Dipping into hummus, labneh, or garlic sauce
- Packing into lunch boxes without worry
- Light side for soups and grain bowls
- Late night cravings that need control
- Hosting casual hangouts with easy food
- Meal prep snacks that stay crisp
CAVA Pita Chips Ingredients
3 loaves traditional Lebanese pita bread – I always use thin Lebanese pita, the kind you find at Middle Eastern bakeries or brands like Damascus Bakeries. It bakes light and crisp, not hard. If your pita is thick, just split it first.
3 tablespoons olive oil – Olive oil helps the pita toast evenly and gives a clean, simple flavor. I usually use regular olive oil, not fancy, because it coats better and won’t overpower the bread.
¼ teaspoon salt – Salt wakes everything up. It brings out the baked pita flavor and keeps the chips from tasting bland without making them too salty.
¼ teaspoon black pepper – This adds a soft warmth in the background. You don’t really taste pepper, but you miss it if it’s not there.
½ teaspoon garlic powder – Garlic powder gives that classic CAVA pita chips taste. I double it on purpose because it flavors the chips evenly without burning like fresh garlic does.
Ingredients Substitutions & Variations
- Avocado oil instead of olive oil
I’ve done this when olive oil tasted a little sharp. Avocado oil keeps things clean and lets the pita flavor stand out more. - Sea salt over regular salt
If you like texture, sea salt is nice. You’ll get little pops of crunch here and there, which I honestly enjoy. - Onion powder swap
Sometimes I use onion powder when I want less garlic. It’s softer and more mellow, especially for kids. - Smoked paprika add-in
A small pinch gives color and a faint smoky feel. Not spicy, just deeper. I don’t always use it, but it’s good. - Za’atar for CAVA vibes
When I want that true Middle Eastern touch, I sprinkle za’atar after baking. It smells amazing and tastes familiar. - Whole wheat pita option
It works, but it’s heavier and less crisp. I use it only when that’s what I have. - Gluten-free pita
It can work, but watch it closely. It browns fast and dries quicker than regular pita.
How To Make CAVA Pita Chips
Step 1 | Prepare the Pita
Cut each pita loaf into small, even triangles using a pizza cutter or kitchen shears. Keep both sides of the pita together if using thin Lebanese pita, as this creates a sturdier chip after baking. If using thicker pita, peel the layers apart before cutting. Aim for uniform size so all pieces bake evenly. Slight separation is fine and does not affect the result.
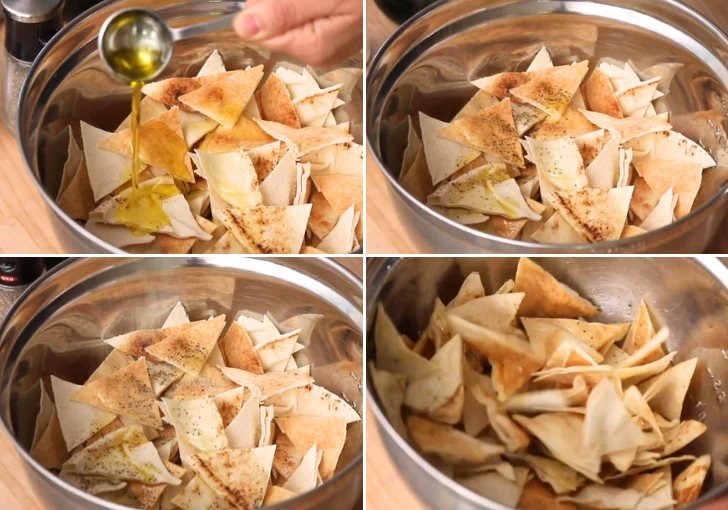
Step 2 | Combine with Oil and Seasoning
Place all cut pita pieces into a large mixing bowl. Drizzle 1 tablespoon of olive oil per pita loaf, totaling 3 tablespoons. Add ¼ teaspoon salt, ¼ teaspoon black pepper, and ½ teaspoon garlic powder. Toss thoroughly using a spoon or hands until every piece is evenly coated with oil and seasoning. Ensure no dry spots remain.
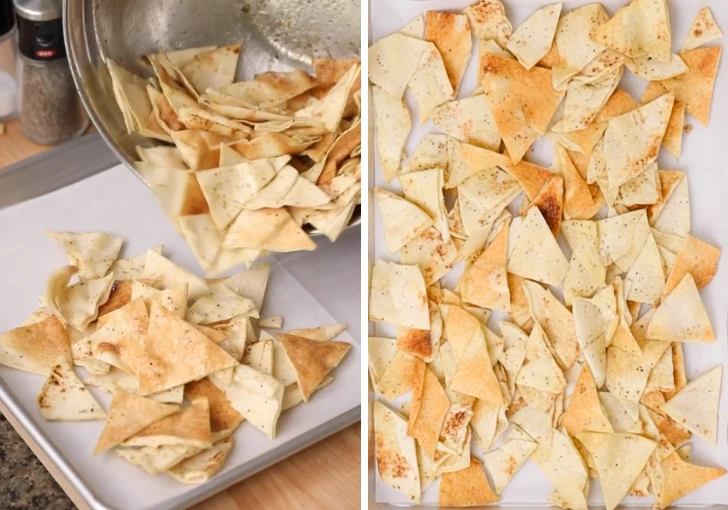
Step 3 | Prepare the Baking Sheet
Line a baking sheet with parchment paper for easy cleanup. Aluminum foil or a lightly greased pan can also be used if preferred. Spread the seasoned pita pieces onto the sheet, separating slightly to allow airflow. Overlapping is acceptable and will not prevent proper toasting.
Step 4 | Bake and Toss
Bake in a preheated oven at 375°F (190°C) for 10–15 minutes total, tossing or flipping the pita halfway through baking to ensure even browning and crispness. Continue baking until the chips are golden and crunchy.
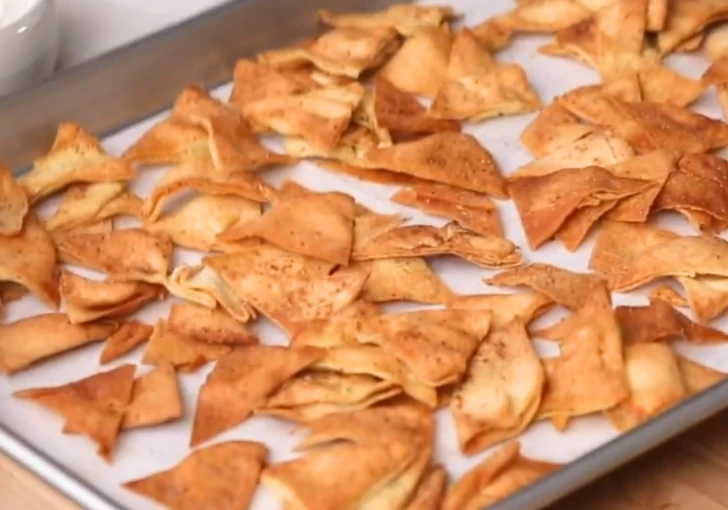
Step 5 | Cool for Maximum Crispness
Remove the pita chips from the oven and allow them to cool on the baking sheet for 5–10 minutes. This cooling stage is essential, as it firms the chips and enhances crisp texture. Avoid serving while hot for best results.
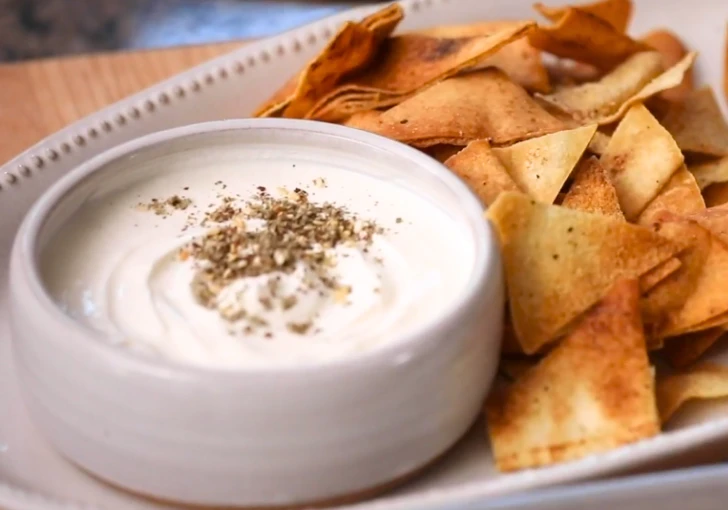
Step 6 | Serve or Store
Serve with labneh, hummus, or any preferred dip. For storage, allow the pita chips to cool completely, then transfer to an airtight container. Store at room temperature for up to 10 days while maintaining crunch.
Tips & Notes To Make Perfect CAVA Pita Chips
Slightly stale pita gives better results
I’ve noticed pita that’s a day old bakes up crispier than fresh. The lower moisture helps the chips dry out evenly instead of turning chewy in the center.
Garlic powder is doubled on purpose
I tried using less at first, and the flavor disappeared after baking. Doubling it keeps that classic CAVA pita chips taste without overpowering or burning.
Always toss halfway through baking
If you skip this, some pieces brown while others stay pale. A quick toss helps every chip hit the heat evenly and crisp the same way.
Let the chips cool before judging them
Right out of the oven, they can feel soft. After five to ten minutes, they firm up and turn properly crunchy, so don’t rush this step.
Mistakes To Avoid While Making CAVA Pita Chips
- Overcrowding the pan – When chips are piled up, steam gets trapped and they turn soft. I always leave some space so heat can move around properly.
- Skipping the halfway toss – If you don’t flip them, one side browns too fast while the other stays pale. A quick toss fixes uneven texture.
- Using fresh garlic – Fresh garlic burns in the oven and turns bitter fast. I learned the hard way that garlic powder gives better flavor control.
- Adding too much oil – More oil doesn’t mean more crunch. It makes chips heavy and greasy. I stick to measured amounts every time.
- Eating them straight from the oven – Hot chips feel soft and misleading. Letting them cool for a few minutes is what actually sets the crunch.
- Baking until dark brown – Once they go too dark, bitterness shows up. I pull them when they’re golden, not deep brown.
What To Serve With These CAVA Pita Chips
Classic hummus or garlic hummus
The smooth, creamy texture works perfectly with the crisp chips. I like how the mild chickpea flavor lets the pita crunch stand out without stealing attention.
Labneh or soft cheese dips
Labneh or any soft, whipped cheese balances the crunch with a cool bite. It feels light and fresh, not heavy or rich.
Lentil or tomato soup
These chips replace crackers really well. I break a few on top or scoop straight from the bowl for extra texture.
Rice bowls or herbed rice
Plain rice bowls, lemon rice, or herbed rice get better with a handful of crushed pita chips mixed in for crunch.
Soft-serve style yogurt bowls
Vanilla or plain soft-serve yogurt with olive oil and salt sounds odd, but the chips add a salty crunch that works.
Mac and cheese
Sprinkle crushed pita chips over warm mac and cheese. They add a toasted bite without needing breadcrumbs or extra butter.
How to Store & Reheat Leftovers
Storing
After the CAVA pita chips cool completely, I move them into a tight-sealed container. I keep them on the counter, not the fridge. Room temperature keeps the texture right.
Stored this way, they stay crunchy for about ten days. I always keep them away from steam, the stove, or sunlight, since moisture softens them fast.
Reheating
If the chips lose their crunch, I use the oven, never the microwave. I spread them on a baking sheet and warm them at 350°F for three to four minutes. That dry heat removes moisture and brings the crisp texture back without burning.
FAQs
Are CAVA pita chips baked or fried?
CAVA pita chips are baked in the oven. Baking gives them a dry, clean crunch without soaking them in oil, which is why they never feel heavy or greasy when you eat them.
Can I make CAVA pita chips without garlic powder?
You can leave it out if needed. The chips will still crisp well, but the flavor will be more plain and bread-forward, especially when eating them on their own.
Why are my pita chips not crispy?
Most of the time, they just need more cooling time. Pita chips firm up as they cool. Crowding the pan or low oven heat can also trap moisture.
Can I use whole wheat pita?
Whole wheat pita works, but expect a denser bite. It needs a few extra minutes in the oven and won’t be as light as thin Lebanese pita.
Do CAVA pita chips stay crunchy overnight?
They do if stored correctly. Let them cool fully, then seal them in an airtight container. Even a little moisture can soften them fast.
Can I freeze pita chips?
Freezing isn’t a good idea. Once thawed, the chips absorb moisture and lose their crunch, even if you try reheating them.
How thin should I cut the pita?
I aim for medium triangles. Very small pieces burn quickly, while large pieces stay soft in the middle instead of crisp.
How long do homemade CAVA pita chips last?
They last up to ten days at room temperature when stored airtight. If they smell off or feel soft, it’s best to toss them.
CAVA Pita Chips Recipe (Exact Copycat Like The Restaurant)
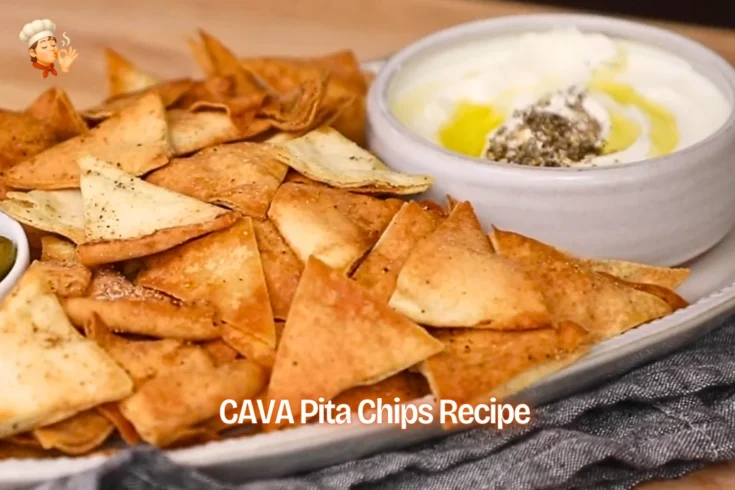
This CAVA Pita Chips Recipe brings that familiar CAVA crunch straight into my kitchen using simple pita, olive oil, and garlic. I make these often because they taste clean, light, and stay crisp for days. If you love CAVA-style pita chips, this homemade version hits close. You can serve them with hummus, labneh, or use them to scoop your favorite dips just like you do at CAVA.
Ingredients
- 3 loaves traditional Lebanese pita bread (thin-style preferred; thicker pita can be split)
- 3 tablespoons olive oil (extra-virgin or regular)
- ¼ teaspoon salt
- ¼ teaspoon black pepper
- ½ teaspoon garlic powder (double the base spice amount)
Instructions
- Cut each pita loaf into small, even triangles using a pizza cutter or kitchen shears. Keep both sides of the pita together if using thin Lebanese pita, as this creates a sturdier chip after baking. If using thicker pita, peel the layers apart before cutting. Aim for uniform size so all pieces bake evenly. Slight separation is fine and does not affect the result.
- Place all cut pita pieces into a large mixing bowl. Drizzle 1 tablespoon of olive oil per pita loaf, totaling 3 tablespoons. Add ¼ teaspoon salt, ¼ teaspoon black pepper, and ½ teaspoon garlic powder. Toss thoroughly using a spoon or hands until every piece is evenly coated with oil and seasoning. Ensure no dry spots remain.
- Line a baking sheet with parchment paper for easy cleanup. Aluminum foil or a lightly greased pan can also be used if preferred. Spread the seasoned pita pieces onto the sheet, separating slightly to allow airflow. Overlapping is acceptable and will not prevent proper toasting.
- Bake in a preheated oven at 375°F (190°C) for 10–15 minutes total, tossing or flipping the pita halfway through baking to ensure even browning and crispness. Continue baking until the chips are golden and crunchy.
- Remove the pita chips from the oven and allow them to cool on the baking sheet for 5–10 minutes. This cooling stage is essential, as it firms the chips and enhances crisp texture. Avoid serving while hot for best results.
- Serve with labneh, hummus, or any preferred dip. For storage, allow the pita chips to cool completely, then transfer to an airtight container. Store at room temperature for up to 10 days while maintaining crunch.
Nutrition Information:
Serving Size:
1 generous handful (around 1 cup)Amount Per Serving: Calories: 160Total Fat: 7gSodium: 180mgCarbohydrates: 20g
This CAVA pita chips recipe is one I keep coming back to because it’s simple, reliable, and tastes right every time. The crunch stays clean, the flavor feels balanced, and it honestly hits close to the CAVA pita chips copycat I grab at the restaurant. I’ve made these more times than I can count, and they never last long.